Showing posts with label crafts. Show all posts

Saturday, October 12, 2013

Welcome Fall!

I am officially the worst blogger ever! How did I let two months go by without an update?! Autumn is finally here. This is my favorite time of year! We've been staying busy with football games and trying to go to as many local festivals as we can.


Here is our "Happy Fall Y'all"handprint art that RJ and I made last year. It was our calendar page for the month of September. I'm pretty sure this was the first page we made. It started with a handprint in brown and adding some paint to fill in the tree trunk. Then RJ made leaves using fingerprints in the autumn colors of paint. I cut the text out using my cricut and added it later. This is definitely not the best artwork we've made, but I still love it!

What fall themed crafts are you guys working on?

Sunday, August 4, 2013

My Sunshine

Has it really been over a month since a blog post? Where does the time go? We haven't really been doing anything exciting. Just busy with day to day life. We have finally got settled in our new house. There are still a few boxes to unpack, but it's all coming together.

I missed a few months of our handprint art. Now that we have internet at home and I can use my computer, I hope to get caught up. Here is our August page. It is by far my favorite.

You are my sunshine

We made this one by painting the palm of RJ's hand yellow and fingers orange then stamping in several times until we made a circle. I actually did that on a separate piece of blue scrapbook paper and cut around the sunshine design. I then glued that to the second sheet of scrapbook paper and added the wording. I again cut the letters using my cricut and the type candy cartridge. I love, love, love how it turned out!

Tuesday, April 30, 2013

zoo art

Last weekend the weather in Memphis was gorgeous (this past weekend, not so much!). We took advantage of it and went to the zoo. RJ had a wonderful time. I think his favorite thing was seeing the elephants. He kept saying "Yoo hoo, ell-yee-font, where are you?".  We bought a family membership, so we plan to go back often.

Feeding the giraffe!


Finally found the elephants!
Since April is almost over, I need to share the calender art for the month and it goes along perfectly with our trip to the zoo.


The zebra was stamped in white directly on to the tan paper. The elephant and lion were stamped onto white paper and then cut out and glued to the tan paper. I used a small paint brush to add the mane and feet to the lion and a small circle foam brush for the head. All of the other details were drawn in with a black marker. This is one of my favorite pages! Hope you like it!

Sunday, March 24, 2013

Easter art

I can't believe Easter will be next weekend! I really need to get busy with Easter baskets, treats and finding RJ an Easter outfit. Last night I asked if he wanted to see the Easter bunny and he freaked out in a good way. I guess I need to make that happen soon.

RJ's Easter Art
Here is the March page from out handprint calender. I think it is adorable! The prints are pretty self explanatory. The bunny is his hand painted white with fingers spread Star Trek style. I went back and added pink for the ears and nose and added the details with a sharpie. The flower is just the ball of his foot and toes in bright pink with a stem and leaves painted on later. The chick is his hand (minus the thumb) in yellow with detais added with markers. Hope you like it!

Friday, March 15, 2013

lucky charm

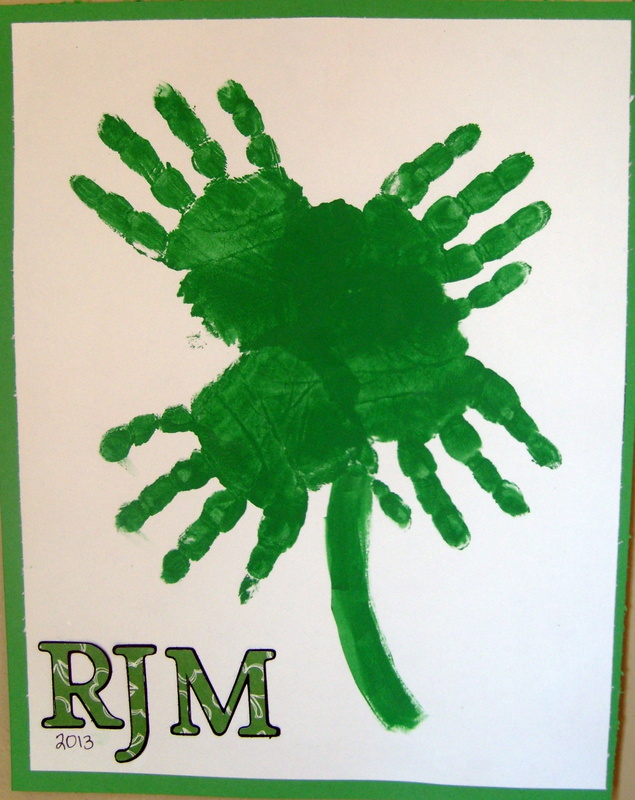
It had been a while since RJ and I made an art project. So this week we worked on this little lucky charm:
St. Patrick's Day handprint art

I think it would have looked more like a clover if his fingers had been closed. But you can tell what it is supposed to be and RJ had fun making it. I added his initials and the year for a cute little detail.

me and my buddy (he so needs a haircut!)

Sunday, March 3, 2013

mouska birthday party- success!

The Birthday Boy!
We had RJ's birthday party last weekend. It was so much fun! This was the first party we've had with little kids coming instead of just family. Our house is small, so it was kinda cramped, but we had a great time! I love how all of the DIY projects turned out. Some of them were a lot of work, but totally worth it!
We served "hot diggity dogs" with chips and dip. I warmed the hot dogs in the crock pot and also had chili, cheese and the fixin's. Here's RJ helping get things set up.
Hot Diggity Dogs
I made cupcakes with Mickey Mouse cupcake toppers (using the Cricut). I also made the super cute Mickey Mouse cupcake stand. I basically used this tutorial http://www.annies-eats.com/2010/08/19/how-to-make-a-cupcake-tower/ and made the Mickey out of styrofoam balls. I LOVE the way it turned out!
Mickey Mouse Cupcake Stand
 
I also made Mickey Mouse oreo pops. They turned out so cute, but were so much work!
Mickey Mouse Oreo Pops
 
A picture of me with the birthday boy. We were both worn out by then. You can see a bit of the "Happy Birthday" banner I made, again using the Cricut. And a picture of just the banner.
 

Mickey Birthday Banner


Tuesday, February 19, 2013

meeska, mooska, mouska birthday party!

I can't believe RJ will be two years old this week! The time has gone by way too fast. We are going to celebrate with a Mickey Mouse themed birthday party this weekend. Mickey Mouse and the gang seem to as popular as ever. Every kid I know loves the show and RJ is no exception. I've been working on making his party special with some handmade details. I found so many ideas on Pinterest. I had to limit what I would make, would I would buy and what I would just wish I could have!

The invitations were something I could definitely make myself. Here is what I ended up with:
 
I used my cricut and the Mickey and Friends cartridge to cut the shape of Mickey's head in black and red. I used the shadow function to make the yellow piece. The red head was cut into a semi-circle and attached just around the edge to make a pocket. I downloaded a Mickey font and a Disney font for the actual invitation part. It was printed on white card stock and cut using a circle shape from the Classic Font cartridge and the center cut feature. I had to play around with it and use some trial and error to get the size right. For the finishing touch, I hot glued buttons on the red pocket. I love the way they turned out! I think using the Mickey and Disney fonts made it perfect. If you don't have a cricut, the basic shapes would be easy to make (but the cricut sure does help!). Hope you like them! 

Friday, February 8, 2013

little fingers and little toes


For Christmas this past year, RJ and I made calenders for all of the grandparents and a few other special friends. All of the pages were made of artwork using RJ's handprints and footprints. We had so much fun making it! The people who received the calenders as a gift loved them. Since I'm such a slow blogger, you get to see January and February today.

Let it snow!
Our art time usually meant getting the handprints or footprints I needed for that page. Later on, I went back and added the details. For the January "Let it Snow!" page, I painted RJ's hand with white paint and got a nice handprint in the middle of a page of blue scrapbook paper. I added white paint at the bottom using a round sponge brush to fill in the snow. The details on the snowmen were added with a marker and little bits of scrapbook paper. The letters were cut on my cricut and the snowflakes were done with a paper punch. I love how it turned out!

I love you!

The February page had to be about Valentines Day! I started out by getting red footprints in the shape of a heart. The footprints didn't really look like a heart, but cutting a heart around them helped. Again the letters were cut out using the cricut. "From the bottom of my heart to the tips of my toes, I love you!" Sweetest Valentine I've ever seen!